10 Common Mistakes When Setting Up a Terrace Irrigation System
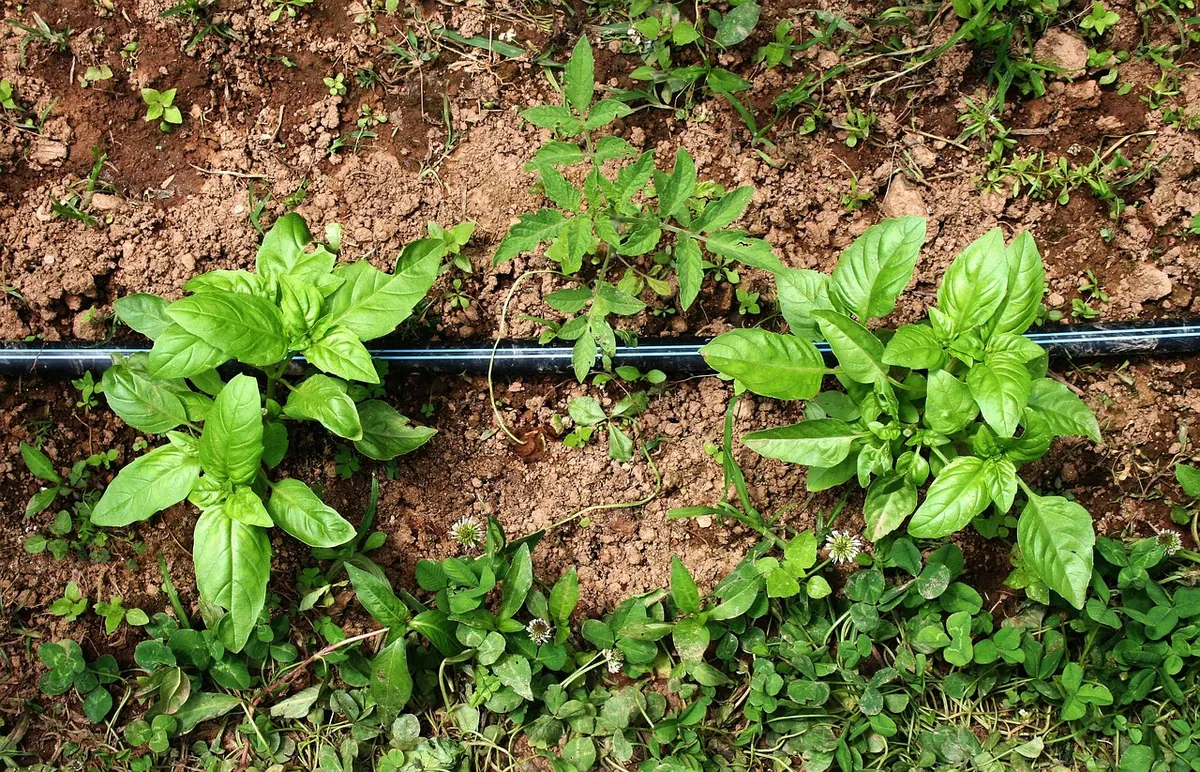
A terrace irrigation system looks like the easy part of a planting plan. Run a line of tubing, poke in a few drippers, set the timer, and go inside for a cold drink. It works beautifully for about three weeks. Then the pots at the far end start drying out, the basil droops, and you are back outside with a watering can, wondering what went wrong.
Most of the time, nothing is broken. The problems come from quick decisions made at the start: the wrong emitter, one schedule for every plant, no filter. None of them are expensive or difficult to correct, and fixing them usually takes less time than a single rescue watering session.
Here are the mistakes that show up most often, and what to do instead.
1. Choosing Emitters by Guesswork
Drippers commonly come rated at 2, 4 and 8 litres per hour, alongside micro-sprays, in-line drip tubing and soaker hose. They are not interchangeable, and the label matters more than the packaging suggests.
Match output to pot size and plant appetite. A 20 cm herb pot wants a single 2 litre per hour dripper. A large planter holding a small shrub might need two 4 litre emitters, or one 8 litre emitter placed off-centre with a second line of tubing. In-line drip is well suited to a long row of hedging or a narrow bed, while micro-sprays cover ground cover and low foliage better than pointed drippers.
The usual error runs the other way too: a fast emitter in a small pot. Water races through the root ball and out the drainage hole, leaving dry pockets behind, and the compost stays wet far longer than the plant can use. Roots suffer, and fungal problems follow.
2. Ignoring Pressure, Flow and Line Length
Household tap pressure is usually far higher than drip components like. A pressure regulator and a filter fitted right at the tap solve most of this in one go, and they are the two accessories worth buying before anything else.
The second half of the problem is flow. Push too many emitters onto one run of 13 mm tubing and the first plants flood while the last ones get a trickle. Keep runs reasonably short, count the total demand of the emitters on each line, and if the numbers look tight, split the run rather than hoping for the best. On long runs and sloped terraces, pressure-compensating emitters are worth the extra cost: they deliver a consistent rate regardless of where they sit on the line.
3. Putting Every Plant on One Schedule
A single timer zone is convenient and almost always wrong. The plants on a terrace rarely want the same amount of water at the same time. Before you fix the layout, group them:
- Full sun versus shade. A sun-baked south-facing pot can lose moisture twice as fast as one against a north wall.
- Containers versus beds. Pots dry out much faster, and they cannot draw on surrounding soil.
- Thirsty versus drought-tolerant. Rosemary and lavender resent the watering that tomatoes need.
- New plantings versus established ones. Freshly planted stock needs consistent moisture while it roots; mature shrubs rarely do.
Two or three zones, each with its own valve or timer outlet, will do more for plant health than any gadget you can buy.
4. Watering Little and Often Instead of Deeply
Short, frequent cycles feel generous but only wet the top few centimetres of compost, encouraging shallow roots that struggle the moment you miss a day. Aim for a longer soak that reaches the base of the pot, then let the surface begin to dry before the next cycle.
Check rather than assume. Push a finger in, or use a simple moisture meter, about ten centimetres down. Yellowing lower leaves, fungus gnats, green algae on the surface and a sour smell all point to overwatering. Wilting at midday, crisp leaf edges and dry compost below the surface point the other way.
Timing matters as much as volume. Early morning is the safest slot: the plant has all day to use the water, and foliage dries before night. Midday watering loses a lot to evaporation. Evening watering is convenient but keeps leaves and compost damp overnight, which invites mildew and rot in humid conditions.
5. Skipping the Filter, Flush and End-of-Season Care
A clogged emitter does not announce itself. Output drops off gradually, and by the time a plant looks unhappy the dripper may have been barely working for a fortnight. A filter at the tap catches most of the grit and debris that cause this, and it needs rinsing every few weeks during the season.
Flush the lines too. Most systems have end caps or flush valves for exactly this purpose: open them, let the water run for a minute, and clear out the sediment that collects at the lowest point. Hard water leaves scale inside emitters over time; if output drops despite clean filters, soak the emitters in a mild vinegar solution or replace them, since they are inexpensive and quick to swap.
At the end of the season, drain the tubing and store removable parts somewhere frost-free. Water left sitting inside a line that freezes can split fittings you will then have to hunt down in spring.
6. Layout Mistakes That Leave Dry Pockets
Where an emitter sits matters as much as how much it puts out. Pointing a dripper directly at the stem of an established shrub feeds one spot and leaves the rest of the root zone dry. Place it 15 to 20 cm out instead, roughly under the outer edge of the foliage, and add a second emitter on the opposite side for anything in a large planter.
Terraces slope, and water follows gravity. On an incline, run tubing along the contour rather than straight down, and let the flush valve sit at the lowest point. Tubing left exposed to full sun degrades and cracks; tuck it under mulch or gravel, or clip it along the base of a wall where it gets some shade. Sharp bends kink the line and cut flow, so use elbows at corners instead of forcing the tube.
When you commission a new system, watch it run. Five minutes of observing where water actually lands will tell you more than any diagram.
A short setup routine prevents most of the trouble listed above:
- Fit a filter and pressure regulator at the tap.
- Install the emitters, then run the system and check each one.
- Flush the lines before planting anything permanent.
- Set separate schedules for sun and shade, pots and beds.
- Note the run time, then check soil moisture two days later.
A Ten-Minute Seasonal Review
Once the basics are right, an irrigation system asks very little of you. Walk the terrace once a week with the system running: look for emitters that have stopped, tubing that has come loose, and pots that are wetter or drier than their neighbours. Adjust the timer as the season shifts — plants drink more in midsummer and much less in cool, grey weather, and a schedule set in June is often too generous by September.
Then do one proper review each spring. Replace cracked tubing, swap out scaled emitters, clean the filter, and check whether last year's zones still match the planting. As shrubs fill out and annuals get swapped, the balance changes. Ten minutes in April saves a summer of hand-watering, and the whole point of the system is that you get to sit down with a book instead.
Photo: heidimaria / Pixabay